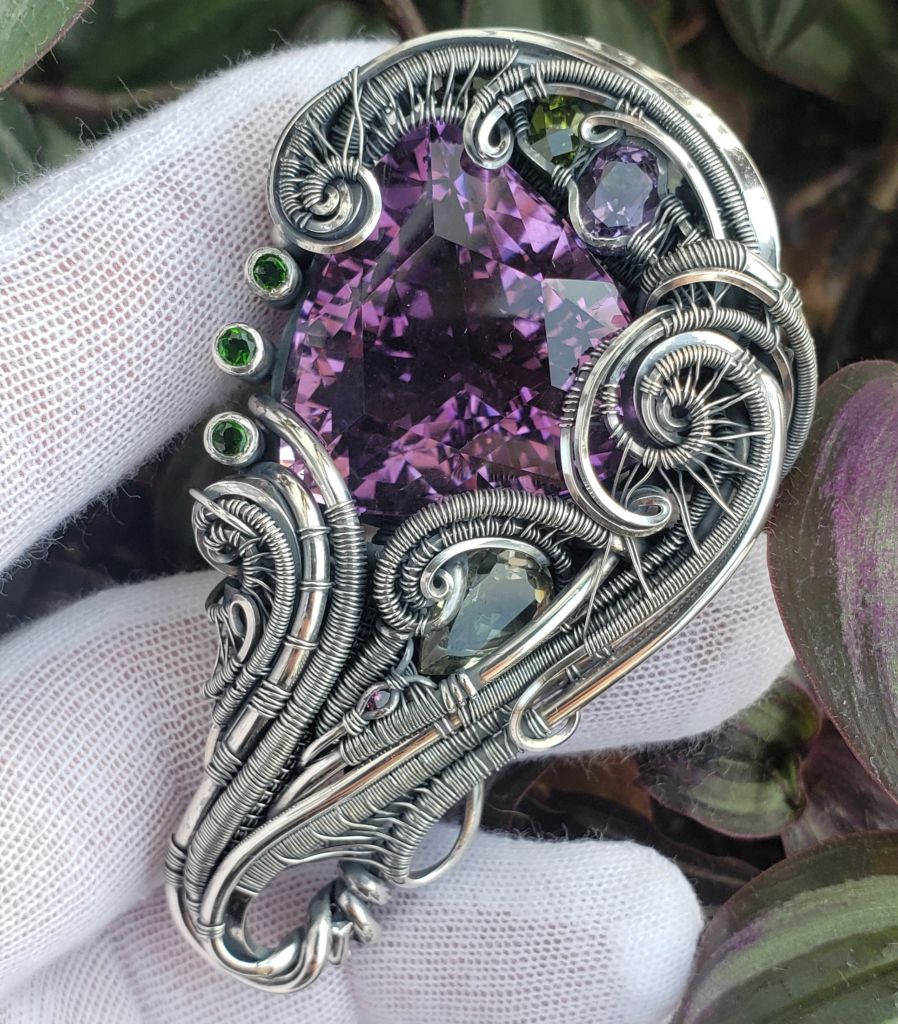
 Jewelry comes in all shapes and sizes. What if I told you, it can also be made with wire? A growing trend in the jewelry industry is “Wire Wrapping.” As the name suggests, it involves twisting wires together in various patterns to form a solid shape around stones, or with stones set inside the wires. Wire Wrapping is a great introduction into the field, and other forms of making jewelry. It is relatively inexpensive to get into, and it teaches you the basics of working with metals and stones – hands on!
What is wire wrapped jewelry?
Wire wrapping is a growing technique for building jewelry. With origins stemming from the lots of Grateful Dead concerts, and underground music scenes. While primitive in its nature, it has evolved into an artform with many different styles and techniques. In its purest form, it involves all cold connections, no soldering or heat, to bring the piece to life. Bringing components and stones together, with wrapping wires together, hence the name “wire wrapping.” But now, there are hybrid forms of the craft that have taken the skill to new levels.
Types of metals/Setting stones in wire
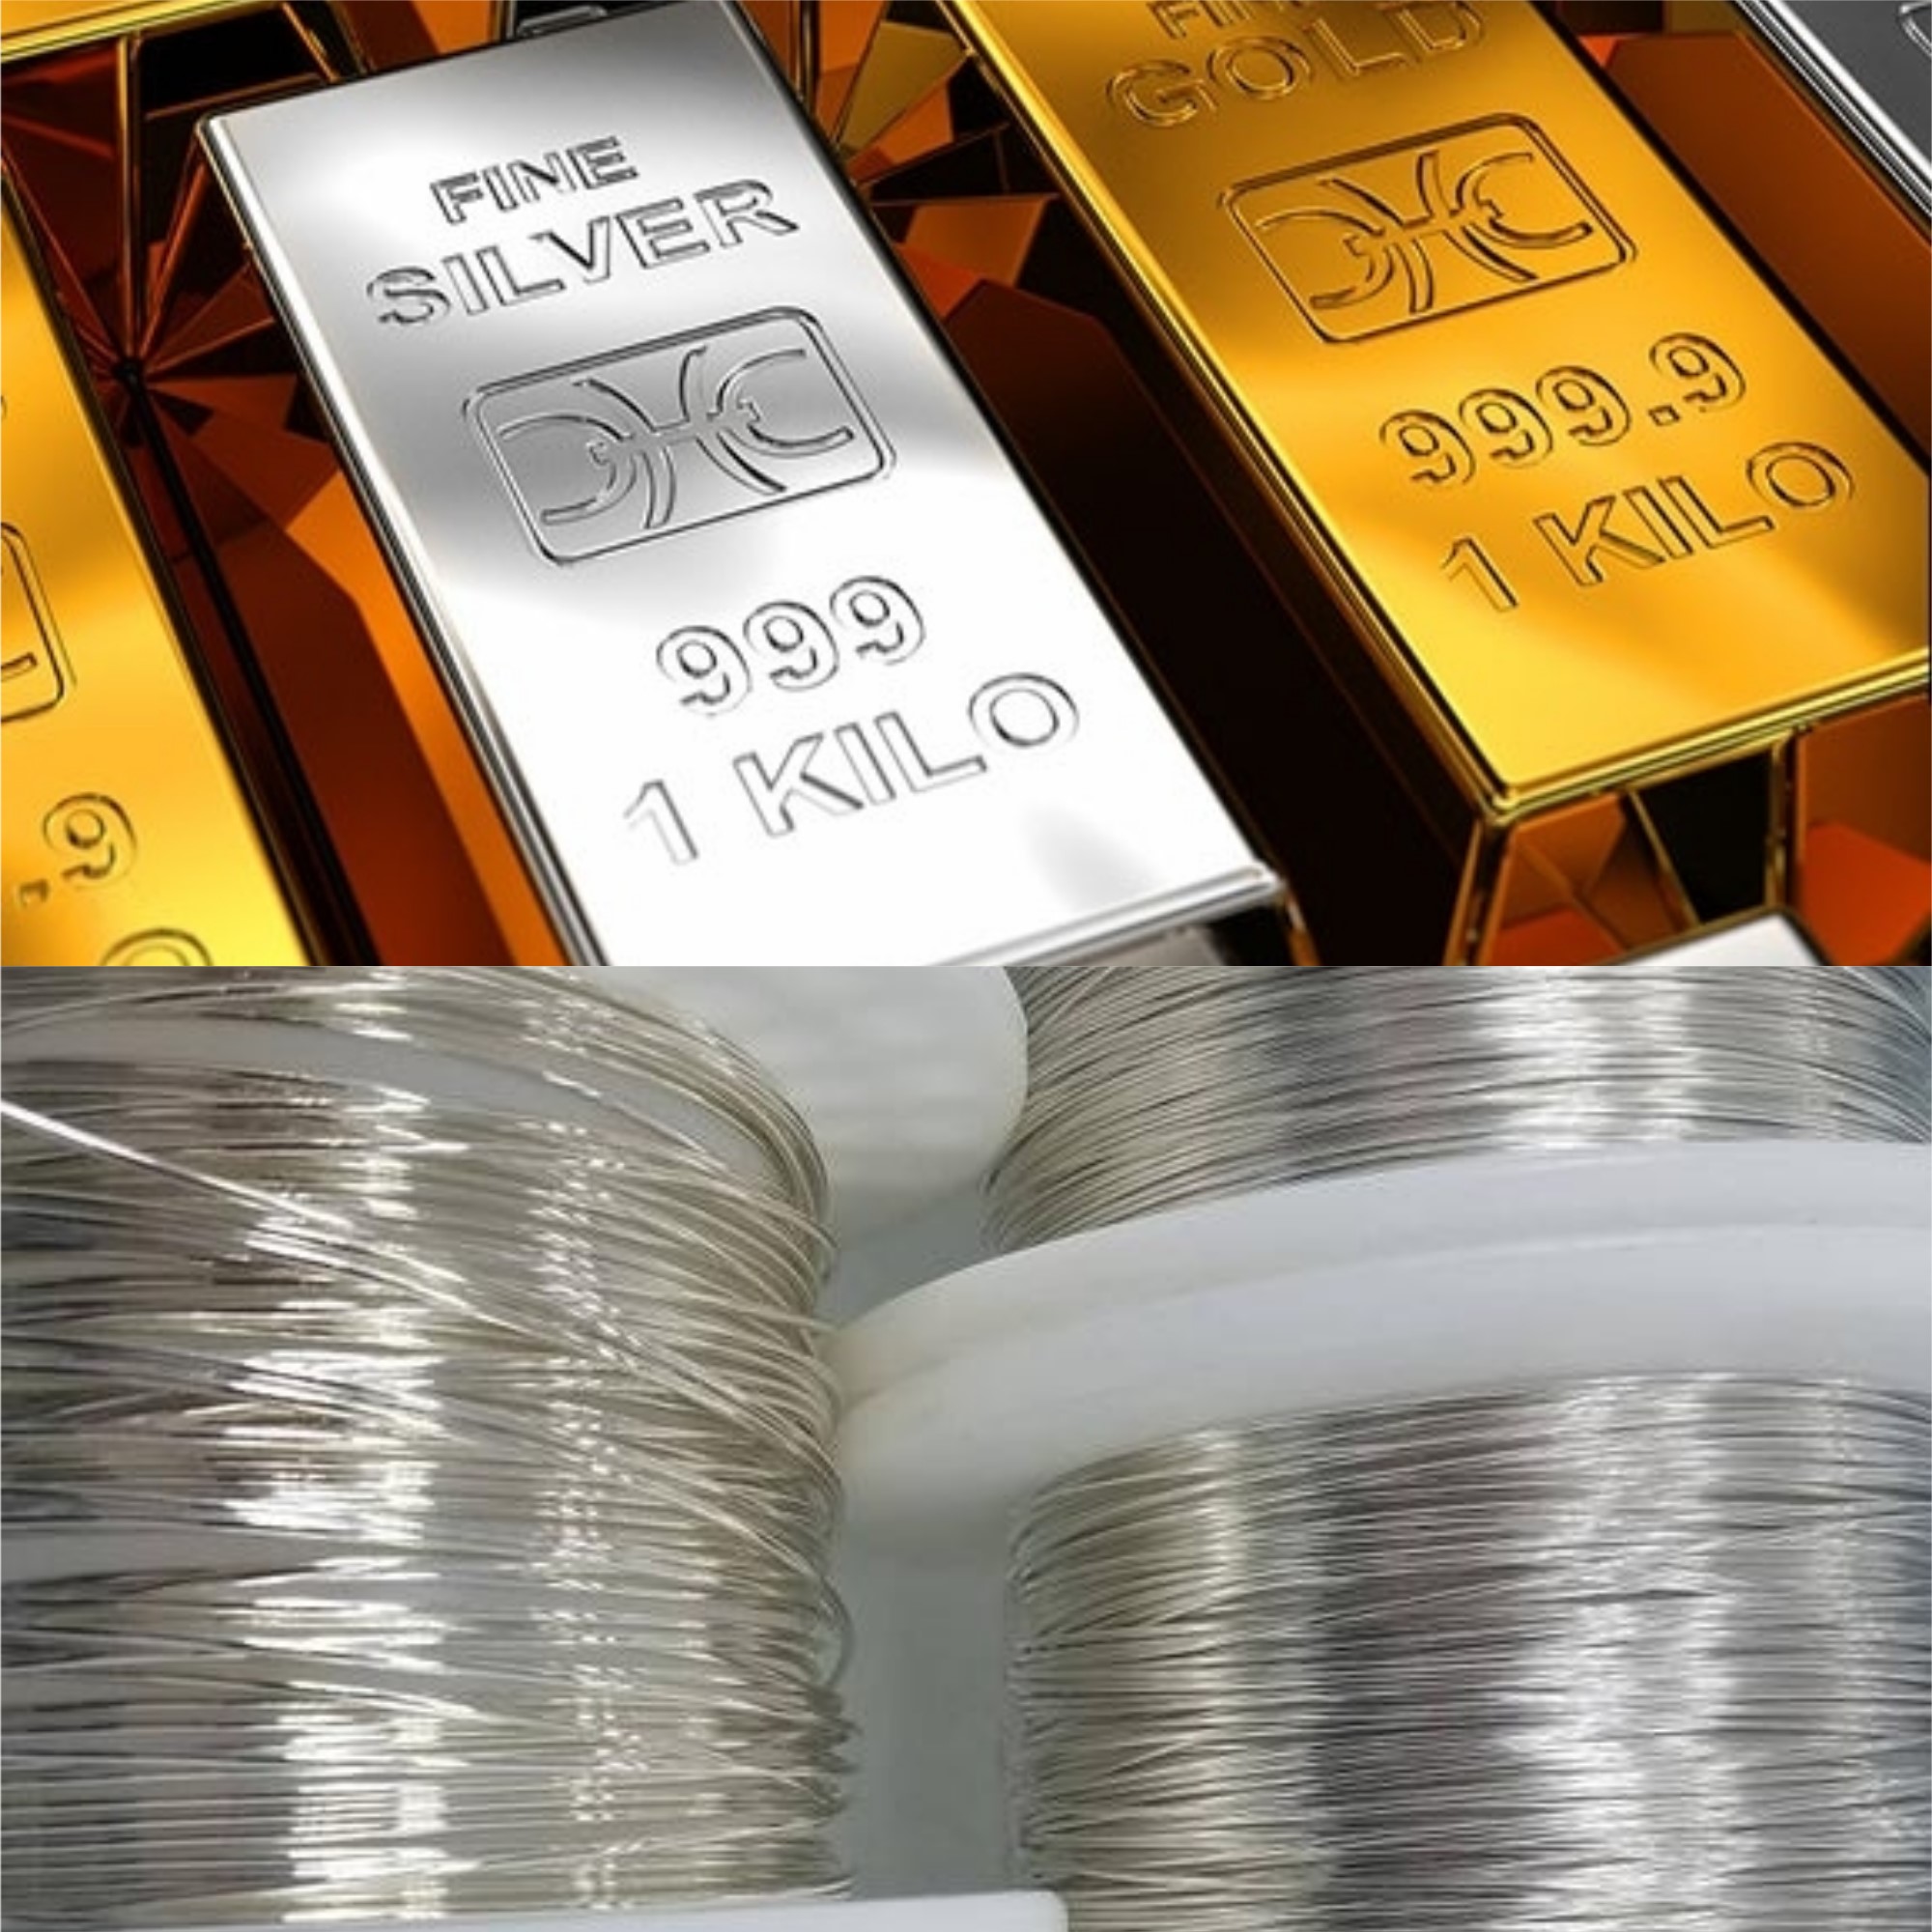 What types of metals are good for use in wire jewelry? When looking into wire jewelry, you’ll run into three main types of metal. Copper, Gold, and Silver. Copper is relatively inexpensive, but a little harder to manipulate than silver. Copper is a great introductory metal into the field. Most wire artists tend to work with silver alloys, Sterling, and Argentium silver are the most common. Gold is a timeless material to work with, but it is one of the more expensive materials to source. Gold will certainly add value to your work, but it is a more limited clientele that can afford gold.
There are also gold “filled” alloys. A pressure plated coating of gold over a core of silver usually, sometimes copper. These are a great alternative for the gold aesthetic without the cost. These should be advertised as so, that way the client knows what they are buying. Various alloys of bronze or brass are also used in some craft style wrapping.
If there is a whole world of metals, we have a whole universe of setting techniques. Each of these are different, and unique in their own way. A few of these techniques are what l will refer to as,
- “Pinch and Lock” method
- “Claws”/“Bowtie” settings
- “Bezel”
-
Pinch & Lock “Tube”
The “Pinch and Lock” method is perhaps one of the most used in wire designs. This method involves pressure setting the stones between wires. Generally, I will “Pinch” and “lock” the stone between the frame, and detailing wires that I have attached to the frame. After attaching the wires, I will twist and weave various patterns into the design, and lock the stone in place. It allows for you to build more details off of the lengths of the setting wires. This is a great, and widely used method in free flow designs. It’s also very adaptable for framed pieces. You can even utilize this method in tandem with claws and other settings.
“Claws” are a great way to display smaller faceted stones. Claws are built like wire versions of Prong settings, and clasp a stone in place with the pushed down folded ends of the wire. You build a “basket” between the
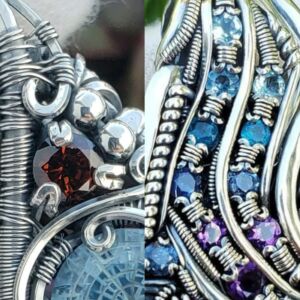
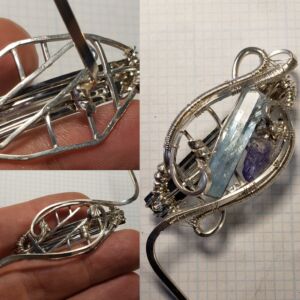
claws, and fold the claws down over the stone. “Bowtie” settings are an incredibly ingenious way to set smaller stones as well. Bowties settings were developed by Miles McDonald (The Art Of Wire). A beautiful, and flowing way to set a channel like a row of smaller stones closer together. Miles is gracious enough to have made a wonderful tutorial on his website and YouTube of the bowtie settings. After you have built your claw, or tie, you can attach them anywhere on the frame to brilliantly display the stone. Much like these, the Tube setting is another gorgeous way to display small stones. (Collage 2 for reference)
“Tube” settings are mainly used in fabrication, or wax casted pieces. But they definitely have a place in the art of wire. These settings vividly display the color and cut of smaller round stones. Think of them as smaller bezel style settings. Tubes come in various metals, and sizes. So it’s important to match the stone size to the appropriate tube. Once you have your tube selected, saw off a length of tube. Solder that baby onto your frame, and give it all a good polish. You’re now ready to set the stone. Utilizing a round burr and dremel tool, you drill a setting for the stone in the tube. You then fold the remaining material over the edge of the stone, just like a bezel!
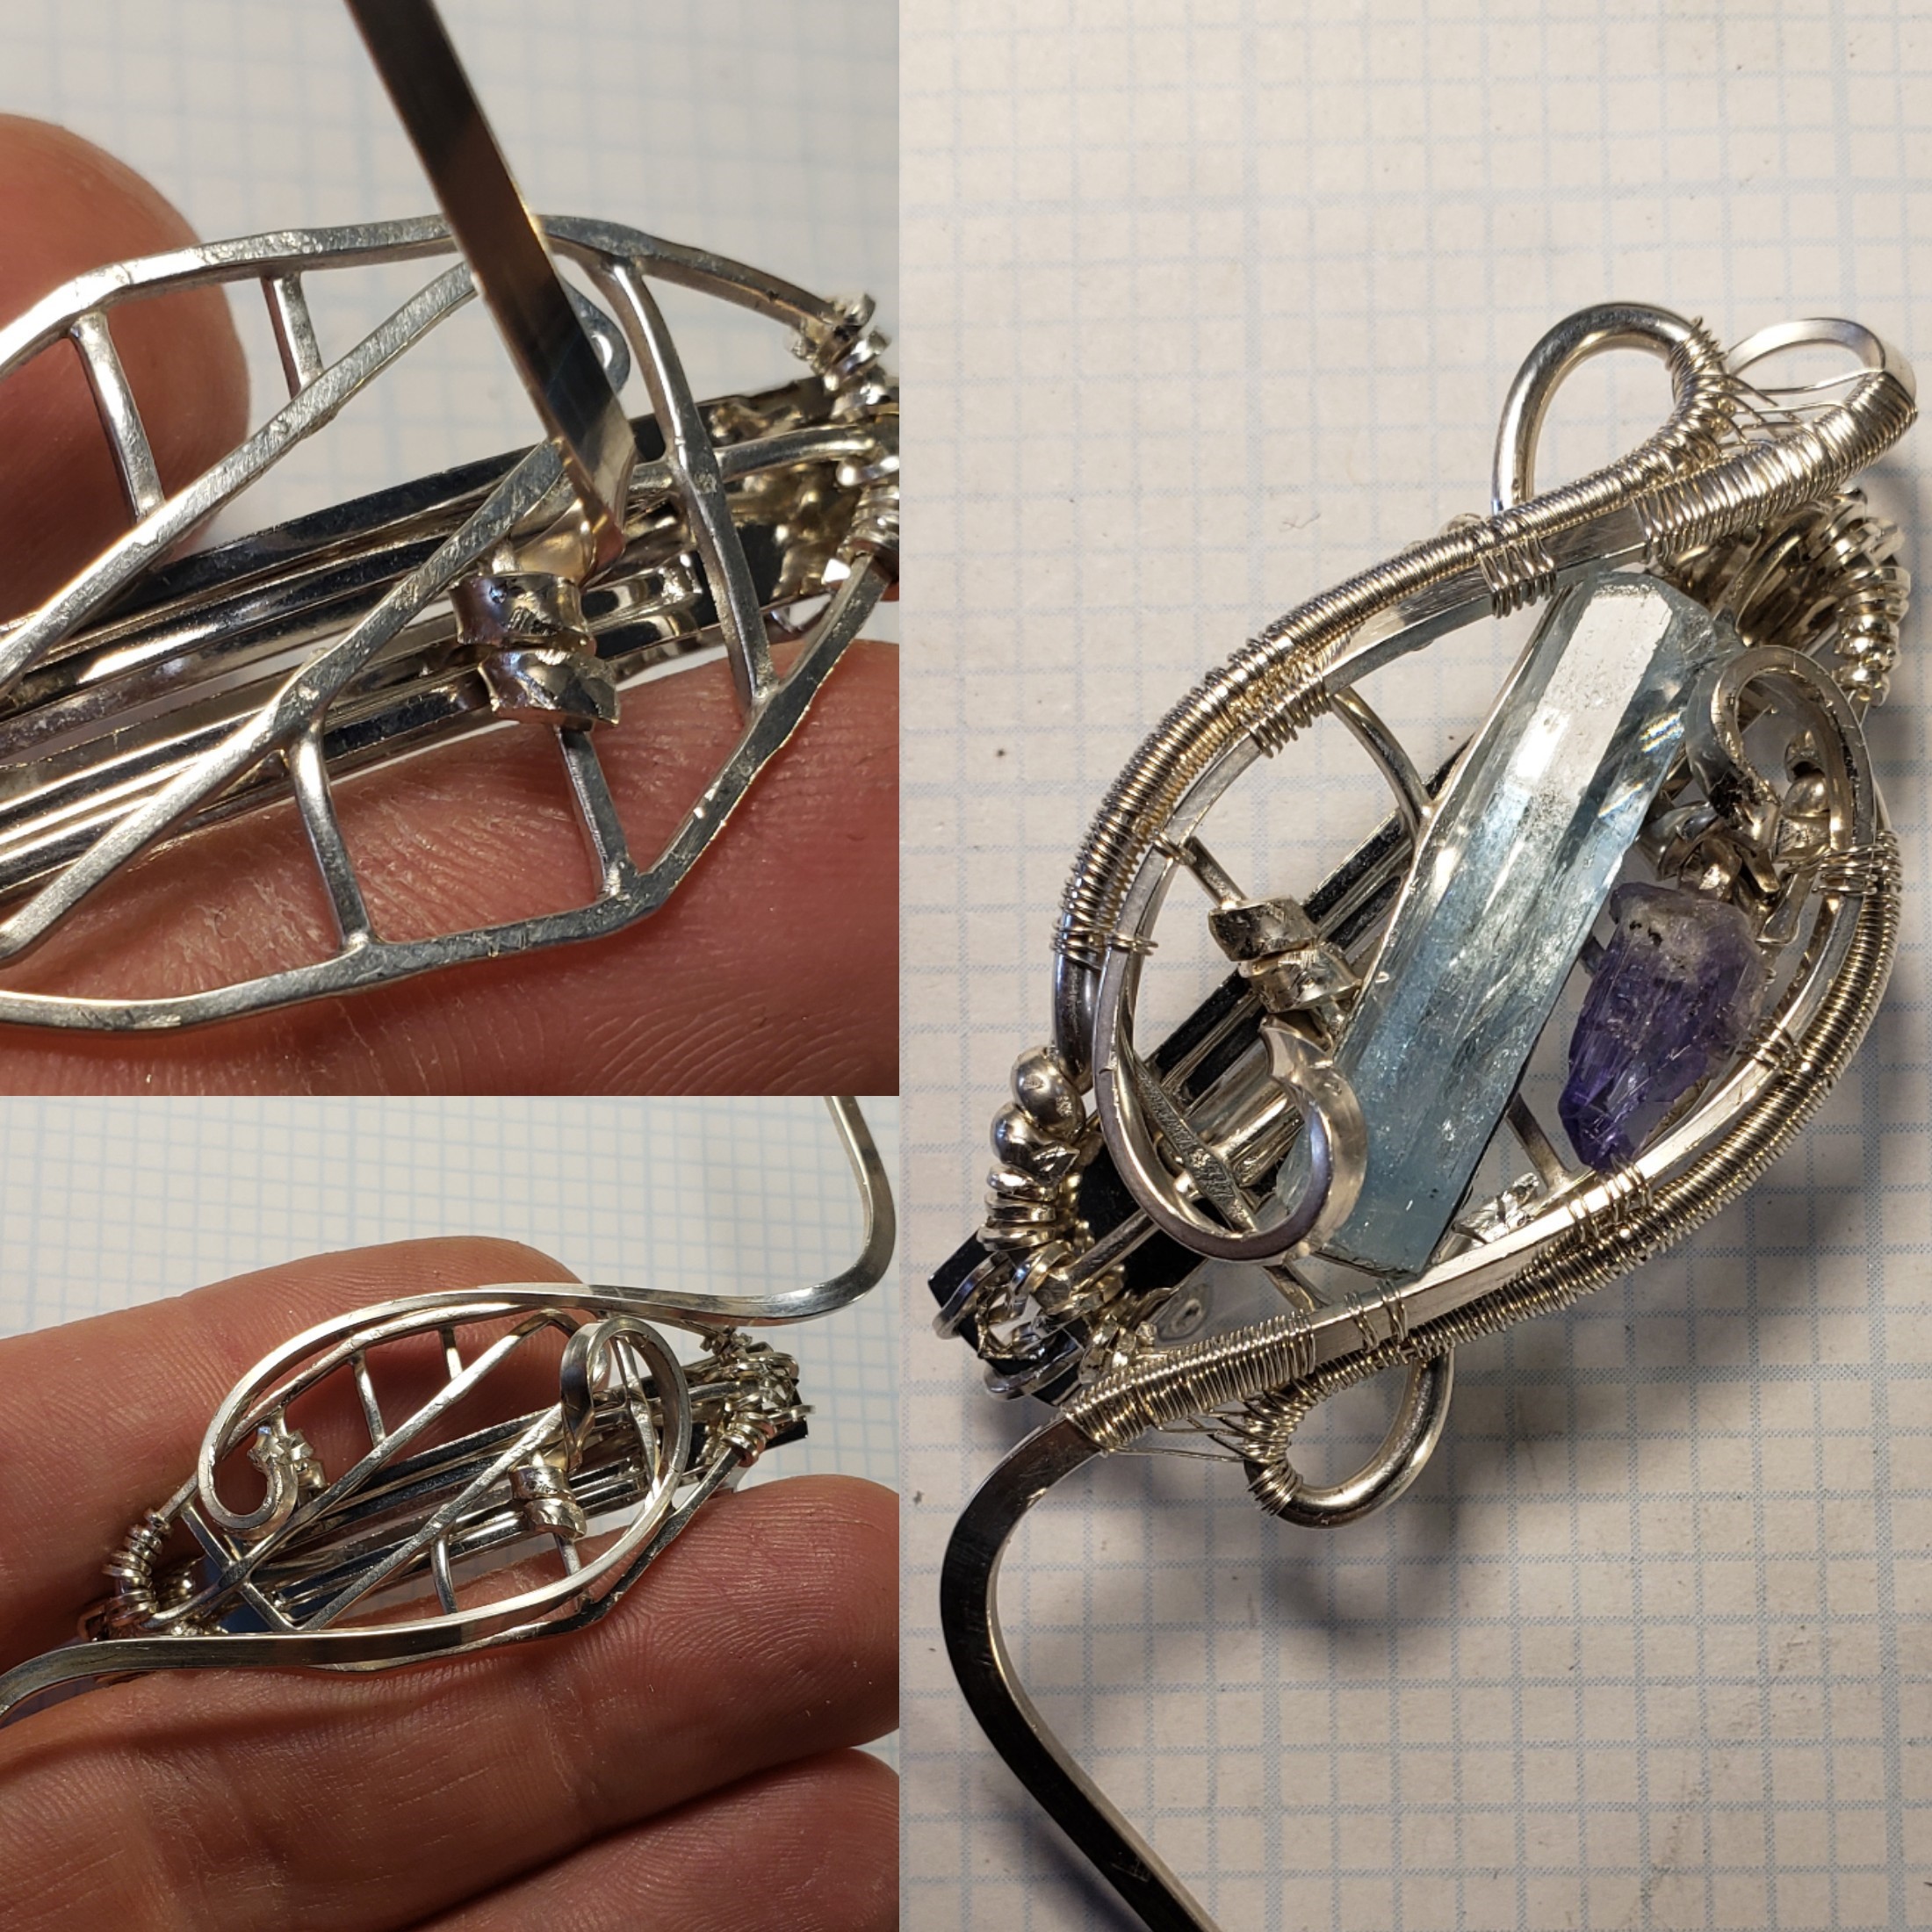
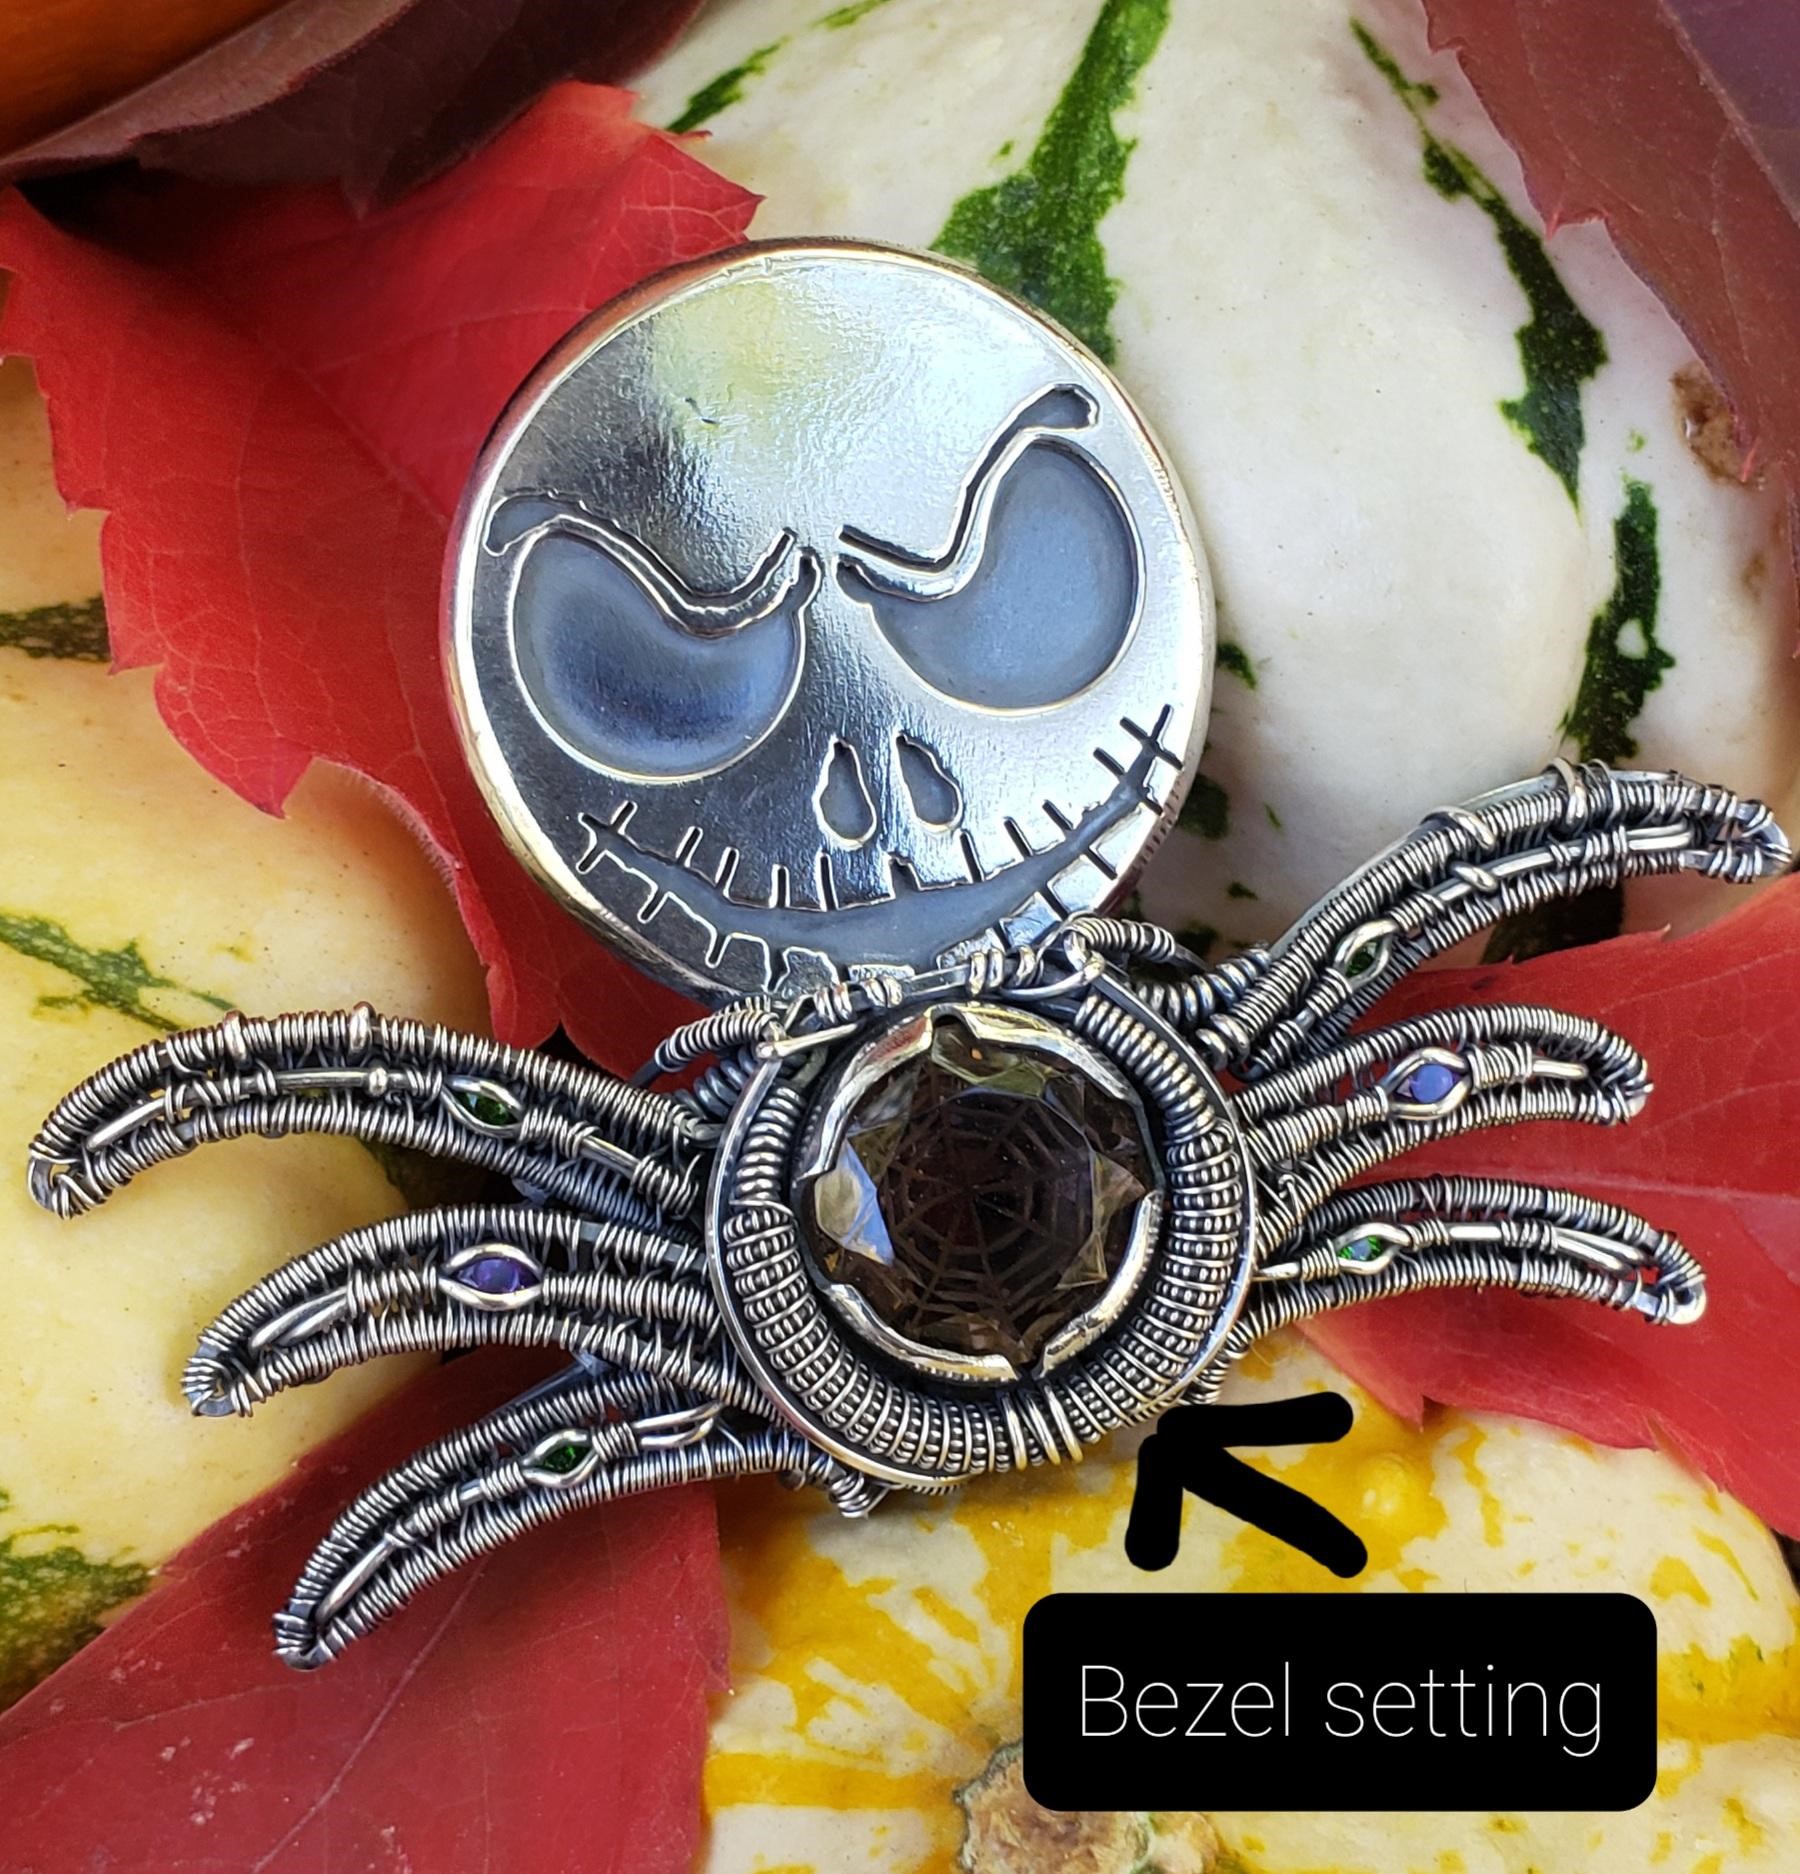 Bezels are a fantastic way to set cabochons, and even some rougher materials into your wire designs. Bezel comes in all shapes, sizes, and designs. You can find solid sheet style bezel, or custom cut flames and webs. Jeff Klein Silver on Etsy and Facebook has a wide selection of custom bezels. Once you have your section of bezel cut, you can attach that to your frame. I recommend building some variety of hybrid frame with sheet metal, or make sure your bezel is attached on all bottom ends to the frame. You really need that solid foundation on the bezel, to get it to fold and form over the stone. (image below)
Getting into wire work – How much does it cost?
Getting started is relatively inexpensive, and you can gather what you need for roughly $100. All you need is some craft wire, cheap stones, and pliers. As your skills evolve, you can invest more into tools, and higher-grade materials. There are limitless amounts of tools you can get for your bench. But that is the beauty of wire wrapping, all you really need is pliers and creativity.
While first stepping into wire work, it can be daunting. My best recommendation is to not be afraid, and just dive in. You’re going to mess up some metal, and possibly break some stones. But through these mistakes, we learn intuitive ways to create new settings. Just like Miles with his “Bow-Ties.” I also offer various tutorials through Youtube, and mainly Patreon under Valk 9 Designs.
There are multiple groups on Facebook that can help you get started as well. Look up “Wire Wrapping” and you’ll find many other people on the same journey. These can be a great resource for information and troubleshooting. Once you become comfortable working with the metal, your imagination really is the only limit. You can fuse all varieties of fabrication and wire settings together to make all types of designs. What will you create?
Author Bio: Andrew Nagel is a jewelry artist based in Montana, USA. He draws his inspiration from the wilderness and mountains that surround his home. A rising talent in wire-wrapped jewelry, he has made significant strides in the industry over the past 5 years. He offers tutorials through his Patreon page and on YouTube. Follow his journey with Valk 9 Designs..